 Hello Chromebook users, today we talk about Kodi installation on your Chromebook. Yes, if you love music, videos then surely you know about Kodi. Kodi is a free media player that is designed to look great on your big screen TV but is just as home on a small screen. Here you can enjoy your favorite music, videos, movies, online shows etc. So here we provide a step by step guide of Kodi installation on Chromebook.
Kodi, installation process is very easy if your Chromebook has inbuilt play store. In Short, You can directly install Kodi App from play store if your Chromebook has Play store then go for it. You can enjoy best Kodi experience without any bugs.
Steps to Install Kodi on Chromebook:
As we earlier said if you looking for the easiest method of Kodi installation then please install via Google Play store.
What happens if your Chromebook doesn’t have play store. Yes, Many Chromebooks don’t have Play store installed. But Don’t worry about it, you can install Kodi without Google play store on Chromebook.
Steps to install Kodi without Play Store on Chromebook:
- Make sure your Chromebook (CHROME OS) updated with the latest version.
- Install ARC Welder extension on Chrome. Download from here.
- Download Kodi APK from APK Mirror. Download from here.
- All Set, Done.
Basic steps are complete to use Kodi on your Chromebook. Now Open Chrome browser and launch ARC extension. Give the Downloaded Kodi APK path to this extension. Kodi app takes some time to configure on your Chromebook. Once it’s configured you can see Kodi icon on App launch screen. But you see many times Kodi crashes and this is not a parmanent solution if Kodi gives problems on Chromebook. So we need to make a chrome extension for Kodi, so you can use whenever you want. Because after making Kodi extension you don’t need to follow all above installation steps again and again.
Steps to make Kodi Chrome Extension:
As you know ARC welder only allow us to use only a single app on Chromebook. So here we need to make a link to our Kodi app on ARC welder so we can launch Kodi in a given time frame without any delay. To make this extension we need to enable developer option on chrome settings. please follow below steps to enable developer option:
- Open Chrome browser. then CTRL+N
- Now click on right side triple-dot icon.
- Now Click on More tools.
- Choose Extensions option.
- Now enable Developer mode option
- All set, done.
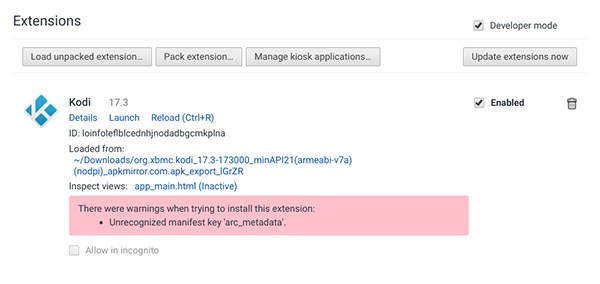 Now, this developer mode helps us to make Kodi an extension-based shortcut for our daily usages. now click on Load Unpacked Extensions button. Now your chrome support extensions. Once you click on this button a file explorer appears on the screen. now go to Download section where your Kodi APK saved. here you need to navigate KODI.apk_export file. now select open button, you will see an extension added on Chrome OS. A pink box appears on screen just ignore it. Now you have Kodi extension in your Chrome to quickly launch Kodi in your Chromebook.


